.svg)
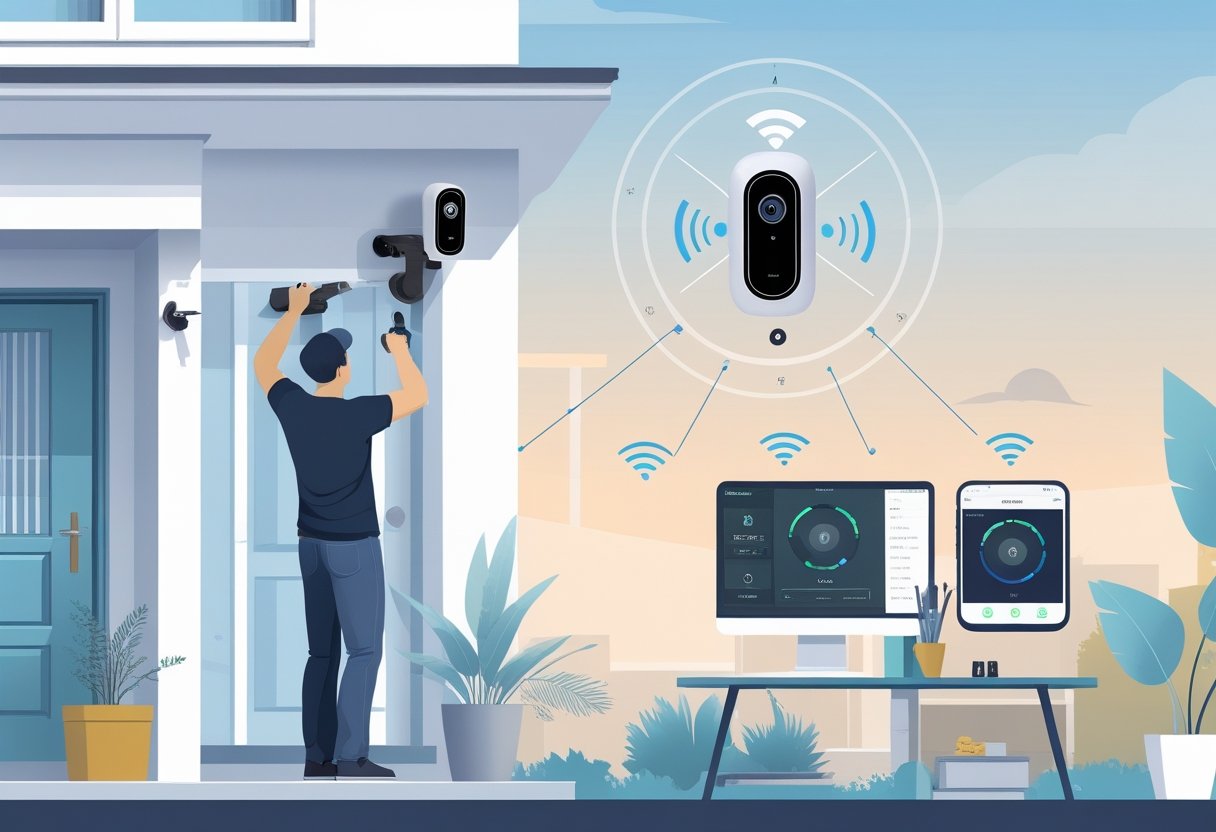
As you consider enhancing your home security, installing a wireless home security camera system is a practical solution. Setting up these cameras is straightforward and empowers you to monitor your property effectively, boosting your peace of mind. With advances in technology, wireless systems are more accessible than ever, allowing you to customize your security setup according to your specific needs.
Understanding how to install these cameras can demystify the process. You will learn about selecting optimal locations for your cameras, connecting them to your home network, and customizing settings for the best performance. This guide will provide you with step-by-step instructions tailored to ensure that your wireless home security camera system operates smoothly.
Whether you are a first-time user or looking to upgrade your existing setup, following a structured approach will make installation easier. With just a few tools and some basic steps, you can create a reliable surveillance system that enhances your safety in the greater Houston area.
Essential Considerations Before Installation
Before you begin installing a wireless home security camera system, it's crucial to consider several key factors. Making informed decisions regarding your camera system, necessary tools, and Wi-Fi signal strength will help ensure a smooth installation and effective operation.
Choosing the Right Wireless Camera System
Selecting the appropriate wireless camera system is essential for maximizing security. You need to decide whether to use indoor or outdoor cameras.
Indoor Cameras: These typically have features like two-way audio and night vision. They're effective for monitoring living spaces.
Outdoor Cameras: Opt for weather-resistant models with motion detection. Look for high-definition resolution to capture clear footage.
Evaluate the system’s compatibility with your existing Wi-Fi network. Some systems may require a dedicated frequency band for optimal performance. Focus on systems offering easy installation, which includes necessary mounting hardware and user-friendly setup processes.
Gathering Necessary Tools and Equipment
Proper preparation involves gathering the right tools and equipment. Here's a list of what you may need:
- Drill: For creating holes in walls or outdoor surfaces.
- Screwdrivers: To secure camera mounts and covers.
- Hammer: Useful for any necessary anchors or fasteners.
- Level: To ensure your cameras are installed straight.
Having these tools at hand will simplify the installation. Additionally, check if the camera system includes any specific mounting hardware. If not, consider visiting a local hardware store to find the right fittings for your installation.
Assessing Wi-Fi Signal Strength
Before you install the camera system, assess the strength of your Wi-Fi signal in the desired locations. A strong signal is vital for uninterrupted streaming and notifications.
You can use a smartphone or laptop to check signal strength at various potential camera locations. Aim for at least 75% signal strength for optimal performance.
If the signal is weak, consider the following solutions:
- Relocate your router closer to the installation area.
- Invest in Wi-Fi extenders to boost coverage.
- Run Ethernet cables if necessary to create a wired connection to your cameras.
Ensuring adequate Wi-Fi signal strength is critical for the reliable operation of your wireless camera system.
Planning Camera Placement and Coverage
Effective camera placement is crucial for your home surveillance system. Planning involves identifying key areas to monitor, selecting appropriate camera types, and ensuring comprehensive coverage both indoors and outdoors.
Identifying Key Entry Points and Vulnerable Areas
Start by mapping out your home’s exterior and identifying key entry points such as doors and windows. These are prime targets for intruders, so they require specific focus.
Make a note of areas like garages, basements, and side entrances, as these are often overlooked. Consider paths that lead to your home and ensure cameras capture any potential approach routes.
Highlight vulnerable areas, such as poorly lit spots, where additional cameras could enhance security. Using outdoor cameras with night vision can be especially beneficial in these locations, as they extend surveillance capabilities into hours of darkness.
Determining Indoor vs. Outdoor Camera Locations
For a robust camera system, balance your indoor and outdoor camera placements. Outdoor cameras are essential for monitoring entrances and yard spaces. They should be mounted at a height of 8-10 feet for optimal visibility and protection against tampering.
Indoors, position cameras in common areas like living rooms and hallways to monitor activity. Avoid placing them in private spaces such as bathrooms or bedrooms to respect privacy concerns. For effective coverage, consider your home's layout and ensure that every angle is accounted for.
Use a mix of indoor cameras for day-to-day monitoring and outdoor cameras equipped with weather-resistant features, ensuring they operate effectively in all conditions.
Maximizing Field of View and Coverage
Maximizing your camera’s field of view is essential to reduce the number of cameras needed. Choose models with wide-angle lenses, as they can capture more area without sacrificing quality.
Estimate the coverage area by considering camera placement; ideally, position cameras to overlap slightly in their fields of view. Creating blind spots can invite security risks.
Additionally, adjust camera angles to focus on specific zones you wish to monitor closely. Always test camera functionality after installation to ensure visibility aligns with your expectations, and reposition if necessary to enhance overall effectiveness.
Step-by-Step Installation Process
Installing a wireless home security camera system requires careful planning and execution. By following these steps, you can ensure that your cameras are positioned effectively and connected properly to keep your home secure.
Mounting the Wireless Cameras
Begin by choosing the ideal locations for your cameras. Focus on entry points, driveways, and areas that might require surveillance. Ensure that the chosen spots have a clear view and are shielded from potential vandalism.
Use a drill to create the necessary holes for mounting hardware. Utilize brackets or mounts that come with the camera for stability. If you opt for battery-powered cameras, verify the battery life to determine how often replacements will be needed.
Once the mount is secured to the wall or ceiling, attach the camera. Make sure it’s angled correctly to capture the desired field of view. After mounting, evaluate the placement by checking the live feed to confirm the camera is positioned accurately.
Connecting Cameras to Power or Batteries
Depending on your system, verify how your cameras are powered. For battery-powered cameras, check the batteries periodically to ensure they are charged for optimal functionality.
If your model requires a power source, plug the camera into an electrical outlet. Ensure that all cords are securely connected and do not create a trip hazard. Make use of cable clips to tidy up any loose wires.
For cameras that are part of a wired system, follow the manufacturer’s instructions for running cables. Ensure the connections are waterproofed if they are installed outdoors. Always check that the camera is receiving power before moving to the next step.
Setting Up Wi-Fi or NVR Connections
Establish a stable Wi-Fi connection for your cameras. Refer to your camera’s manual for specific instructions regarding Wi-Fi setup. Usually, this involves downloading an app on your smartphone or tablet, creating an account, and following prompts to connect.
If utilizing a network video recorder (NVR), connect your cameras to the NVR through your network. Ensure the NVR is connected to your router via an Ethernet cable. Follow the on-screen instructions for adding cameras to your system.
Once everything is connected, test each camera’s feed through the app or NVR interface. Make sure you can view the signals clearly and that the system is functioning as expected. Adjust settings as necessary, such as motion detection and recording schedules.
System Configuration and Optimization
Configuring and optimizing your wireless home security camera system is essential for maximizing its effectiveness. This section highlights key aspects, such as integrating your cameras with mobile apps, customizing motion detection settings, and adjusting camera angles for optimal video quality.
Integrating Cameras with Mobile Apps and Smart Home Devices
Integrating your security camera system with mobile apps and smart home devices enhances your monitoring capabilities. Most wireless cameras come with dedicated applications that allow you to access live feeds remotely.
To connect your cameras, download the appropriate app and create an account. Follow the app's prompts to add each camera by scanning the QR code or entering the camera ID. If using smart home devices like Alexa or Google Assistant, ensure compatibility. This integration allows you to view camera feeds using voice commands on supported devices, enhancing your overall security system.
Customizing Motion Detection and Alerts
Fine-tuning motion detection settings is crucial for reducing false alarms and ensuring you are alerted only when necessary. Access the camera settings through the app to adjust sensitivity levels.
Most systems allow you to customize detection zones, which lets you focus on specific areas for motion alerts. Set notifications for your mobile device to stay informed about any detected activity. This setup allows you to monitor your property effectively and respond promptly to potential security breaches.
Adjusting Camera Angles and Video Quality
Correct camera placement is critical for capturing clear footage. Start by adjusting the camera angles to cover high-traffic areas and any potential entry points. Use mounting hardware to securely position the cameras at optimal heights, ideally 7–10 feet from the ground.
Furthermore, setting video quality impacts both clarity and storage space. Access the app to select the desired resolution, balancing quality and bandwidth usage. For location in the greater Houston area, consider local network capabilities, ensuring you have sufficient upload speeds to support your chosen video quality without interruptions.
Securing Data and Video Storage Options
When setting up a wireless home security camera system, securing data and choosing the right video storage options are critical. Both cloud and local storage come with unique advantages and drawbacks that directly impact the safety and accessibility of your footage.
Choosing Between Cloud and Local Storage
Cloud storage offers convenience and remote access. Your video footage is stored offsite, typically protected by encryption and backed up automatically. This option allows you to access your recordings from anywhere with an internet connection. However, it often comes with a monthly fee and may raise concerns about data privacy.
In contrast, local storage involves using a device like a Network Video Recorder (NVR) or Digital Video Recorder (DVR). This method can offer faster access and greater control over your data. You won’t need a constant internet connection, and there are no ongoing subscription fees. Keep in mind that local storage requires regular maintenance and a secure environment to safeguard against theft or damage.
Managing Access and Privacy Settings
Once you decide on your storage option, managing access is essential for securing your footage. Ensure that only trusted users have access to your video storage. Implement strong, unique passwords for your accounts and regularly update them to prevent unauthorized access.
You should also take advantage of privacy settings available in your home security system. This may include configuring who can view live feeds or recorded footage. Additionally, use two-factor authentication for cloud storage accounts to add an extra layer of security. It's crucial to stay informed about your system's software updates and ensure that your devices are protected against possible vulnerabilities.
Maintenance and Troubleshooting Tips
Maintaining your wireless home security camera system is essential for optimal performance. Regular checks and proactive measures can help you avoid common issues and ensure your system operates smoothly.
Regular System Checks and Firmware Updates
Regular system checks will keep your home surveillance setup functioning effectively. Start by periodically reviewing camera feeds to verify they are operational. Make sure your cameras capture clear visuals and respond to movement as intended.
Updating firmware is crucial for security and performance enhancements. Check for updates through the camera app or manufacturer's website. Follow the provided instructions for installing updates, as they can fix bugs and add features, improving your wireless security camera system's reliability.
Maintaining Battery Levels and Cleanliness
If you have battery-powered cameras, monitoring battery levels is essential. Regularly check the battery status through your camera's mobile app. Replace or recharge batteries as needed.
Also, ensure the camera lenses are clean and unobstructed. Dirt or debris can significantly impact video clarity. Use a soft, lint-free cloth to wipe down the lenses. Additionally, inspect mounting locations for any blockages that could hinder camera functionality.
Expanding and Upgrading Your Camera Network
If you're considering expanding your camera network, ensure compatibility with your existing home security system. Choose additional cameras that support the same app and technology for seamless integration.
Evaluate your home's coverage needs and install cameras in areas that require increased surveillance. Easy installation features in newer models can simplify the process. Check that each new camera maintains a strong wireless signal and configure their settings through your security app for optimal performance.
Frequently Asked Questions
Installing a wireless home security camera system involves several important steps and considerations. You may have specific questions regarding the installation process, setup, and security measures to ensure effective monitoring.
What are the necessary steps to install a WiFi outdoor camera?
To install a WiFi outdoor camera, start by selecting a suitable location that offers a clear view of your property. Securely mount the camera using provided brackets. Connect it to a power source if needed. Finally, sync the camera to your WiFi network through the app or settings.
What should I consider when setting up an IP camera wirelessly?
When setting up an IP camera wirelessly, consider the camera's range and your home’s WiFi coverage. Ensure you have a strong signal at the camera's location. Account for potential interference from walls or interference from other devices, and ensure the camera is positioned to minimize blind spots.
Can you provide a basic step-by-step guide for CCTV camera installation?
For basic CCTV installation, begin by assessing and marking camera locations. Drill holes for mounting and secure the cameras. Connect video cables to the recorder and power supply. Configure camera settings through the system’s software. Test the camera's view and recording before finalizing installation.
How do you ensure a secure connection of a security camera to your home WiFi network?
To ensure a secure connection, use a strong password for your WiFi network. Update your camera's firmware to the latest version. Enable encryption options within the camera’s settings and regularly monitor connected devices to identify any unauthorized access attempts.
What is the easiest method to install wireless outdoor security cameras by yourself?
The easiest method involves using a pre-made mounting bracket and following the camera's installation guide. Use an app to help connect the camera to your network. Choose wireless models with battery power to simplify installation, avoiding the need for additional wiring.
What factors should be accounted for in residential security camera installation?
Consider camera placement for optimal coverage and angles. Evaluate lighting conditions, ensuring the cameras can capture clear images both day and night. Take into account the camera's weather resistance if it is used outdoors, and always check for nearby power sources if needed.


.svg)


.svg)